


Our News
15July,2021
HOW TO REPLACE A REAR AXLE BEARINGS AND SEALS 3/4 AND 1 TON
By : Admin | 0 Comments
REAR AXLE BEARING AND SEAL REPLACEMENT 3/4 AND 1 TON TRUCKS AND SUV'S
This guide is created to show you how to replace an axle seal and bearing on a 3/4 and 1 ton rear axle. Most trucks and SUV's use the same style of Dana rear end so this guide will pertain to most repair jobs.
BEFORE WE BEGIN
Before you begin, park your car on level ground with the transmission in park. You will need to raise up your car with a floor jack and secure it using jack stands for safety and then remove and reinstall the wheel. Remember safety first, never get under the vehicle unless jack stands are in place. We want you to use safety as a normal practice anytime repairs need to be done as you learn automotive repair.
The brake caliper will need to be removed along with the caliper mount and the brake pads.
SPONSORED LINKS
If you are not replacing the brake pads then you don't need to open the bleeder or push the piston back into the caliper for this job.
STEP 1
Remove the Bearing Hub
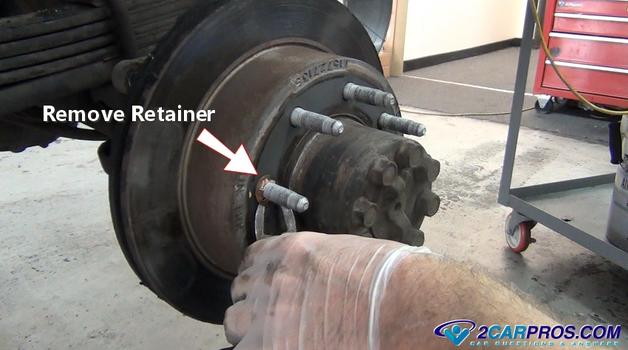
Once the brake caliper, mounting bracket and pads have been removed the brake rotor is next. Some rotors will have this annoying little retainer which is put on during manufacturing to hold the rotor on while the vehicle is moving around in the factory during assembly. This clip can be removed and discarded, use a pair of side cutters (dikes) to get under the clip and with the twisting motion grab the clip to remove.

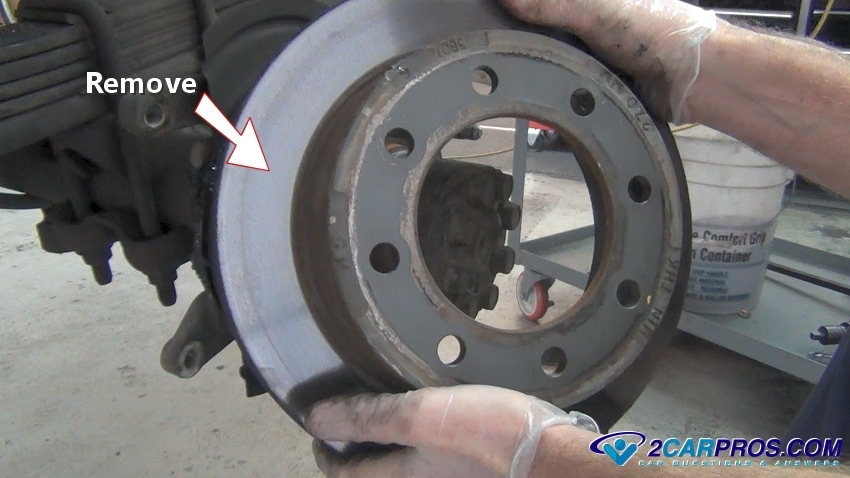
Sometimes the rotor will be stuck on the bearing hub, use a hammer to "shock" it loose by striking it between the wheel studs being careful not to hit the studs. Grasp the rotor and pull it from the hub.
SPONSORED LINKS
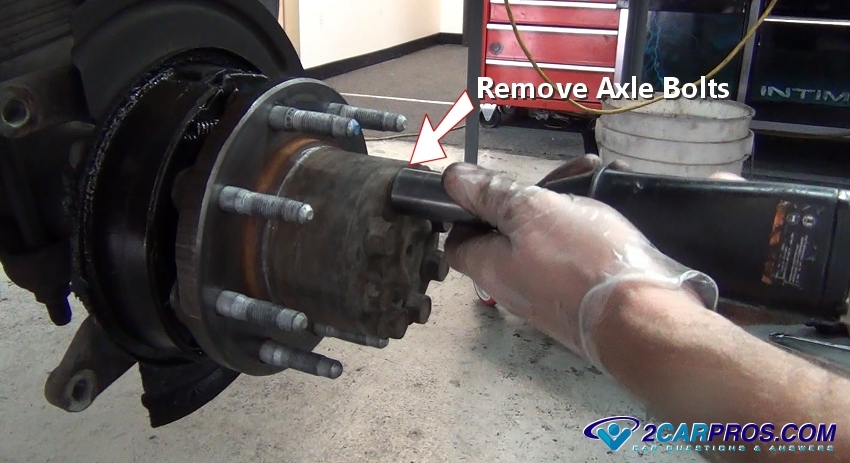
This will expose the parking brake shoes which in this case have been soaked with gear oil and will need to be replaced. If an impact gun is not being used leave the brake rotor on and set the parking brake to help hold the hub from turning while removing the axle bolts. Once the bolts have been broken loose remove the rotor. Continue until all bolts have been removed.
Learn more: How to replace parking brake shoes
The axle will now be loose, grasp the end and pull outward. This will begin the axle removal, have a fluid catch basin ready because gear oil will leak out.
SPONSORED LINKS
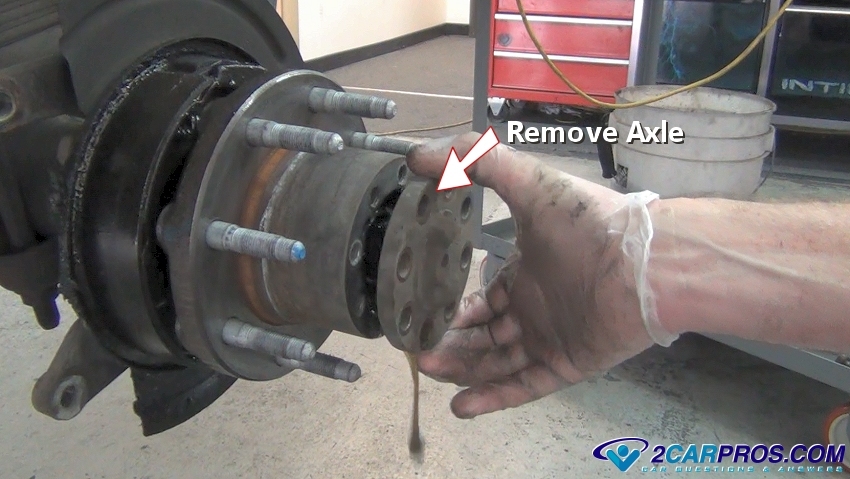
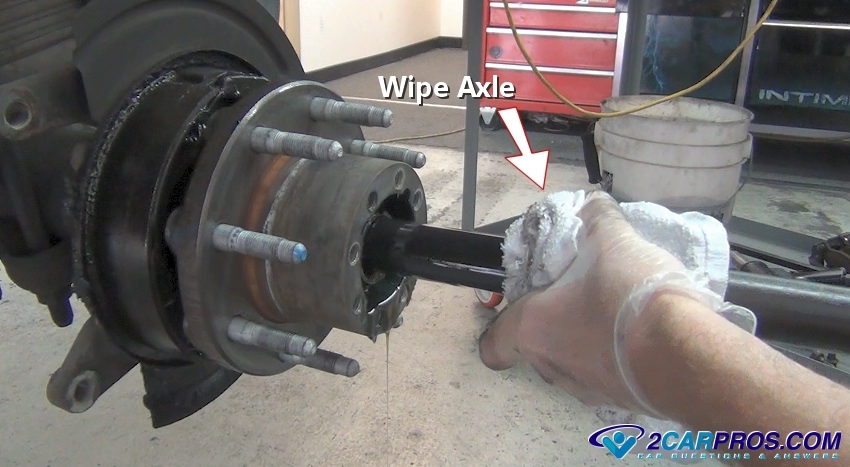
Use a shop towel to rap around the axle and continue to pull it out of the differential. Hold pressure on the towel to wipe the excess gear oil into the fluid catch basin.
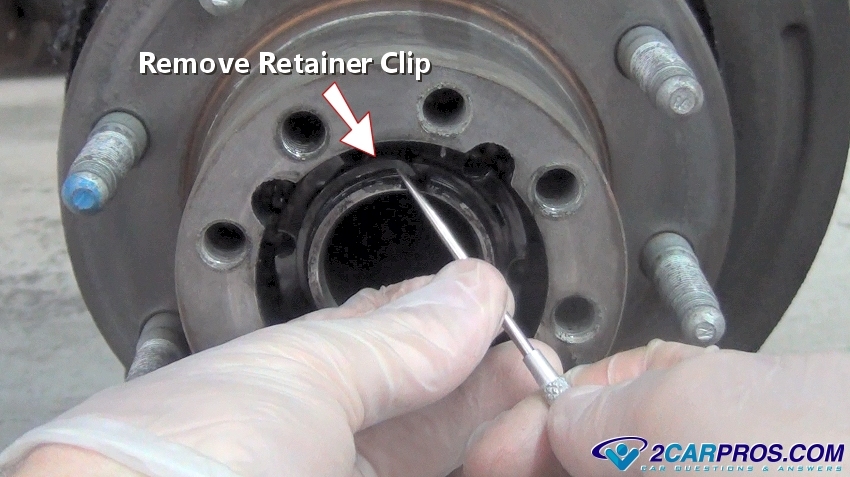
Use a small pick to move the end of the axle nut retainer ring upward. This will allow you to remove the ring while working the retainer ring from the axle tube threads. This ring is made of spring steel so try not to pull on it to hard or it will distort its form and may need to be replaced.
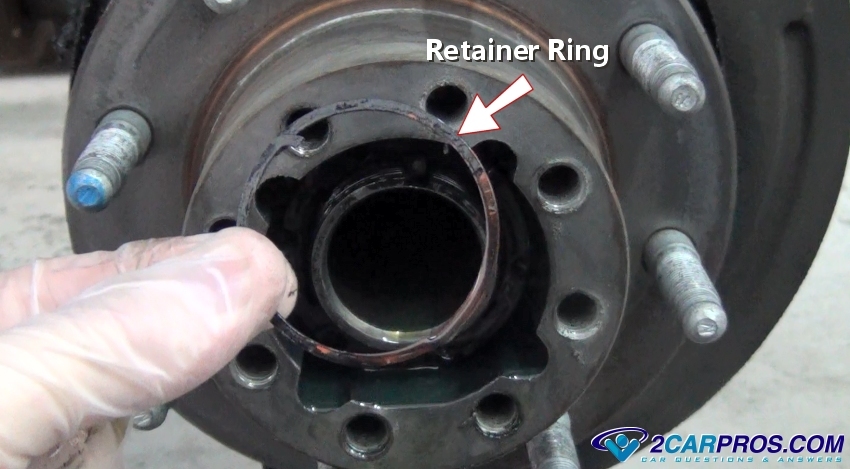
This is what the retainer ring look like when it is fully removed. Wipe this part clean and set it in a plastic container so you do not loose it, there will be more parts to follow.
SPONSORED LINKS
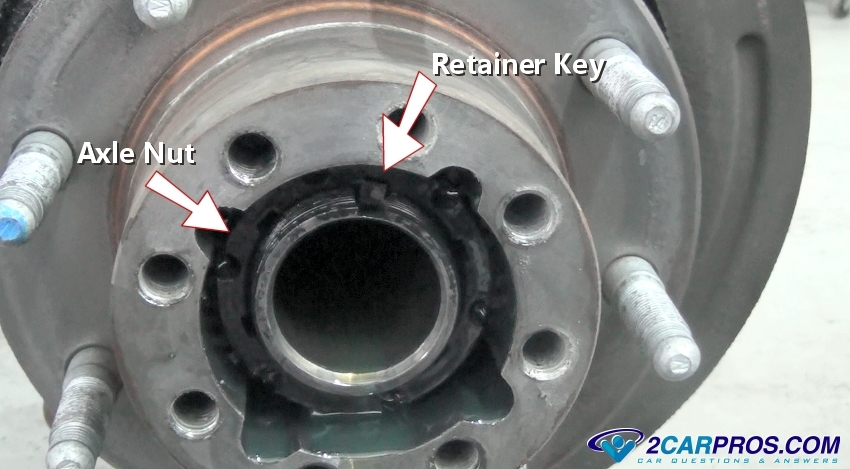
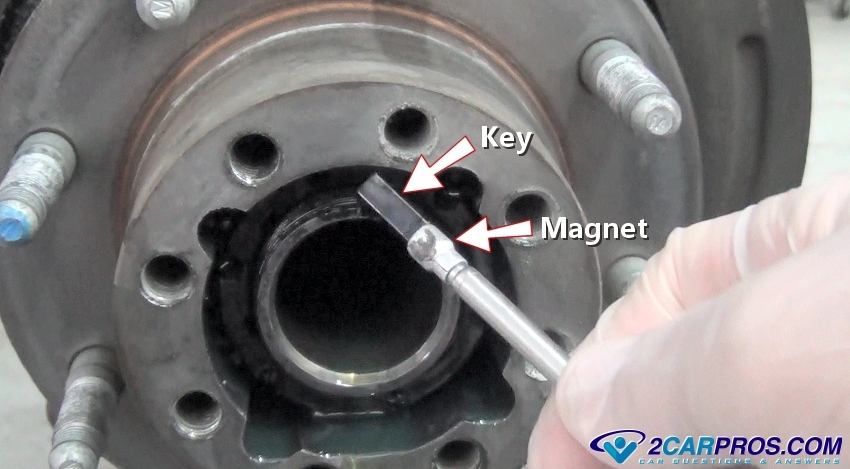
This will expose the retainer key and axle nut. This nut sits on the differential housing loose with the only thing holding it in place is the retainer key. That's why the retainer spring clip is so important to be installed correctly. The key is basically a small square piece of high grade metal the sits in a grove in the axle tube threads in which the axle nut threads onto. You can see the nut has spun a little holding the key from sliding out easily. You can rotate this nut slightly so a small magnet can pull the key outward.
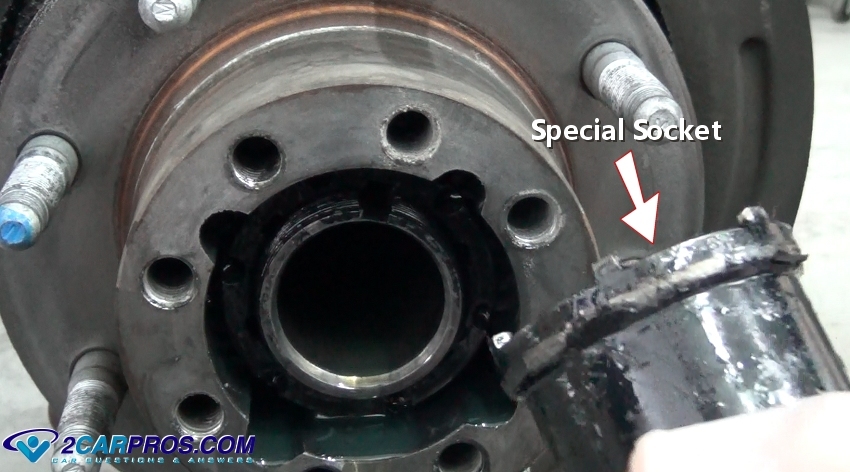
Once the key is removed the nut can basically be removed by hand even though they make special socket for it.
They make a special socket to remove the axle nut but it is not needed even though it makes the removal of the nut easier. Like we said earlier this nut sits loose on the housing threads and can also be removed using the small punch in one of the indentations in the nut.
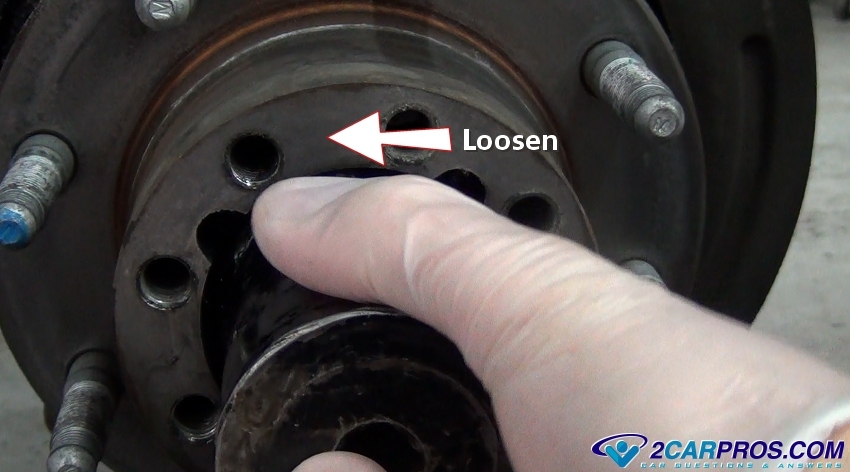
Insert the socket or small punch and start turning the axle nut counterclockwise. You can push the top of the rotor inward which will help take the residual pressure off of the bearing nut and will make it turn even easier. Continue to loosen the nut until fully removed.
SPONSORED LINKS
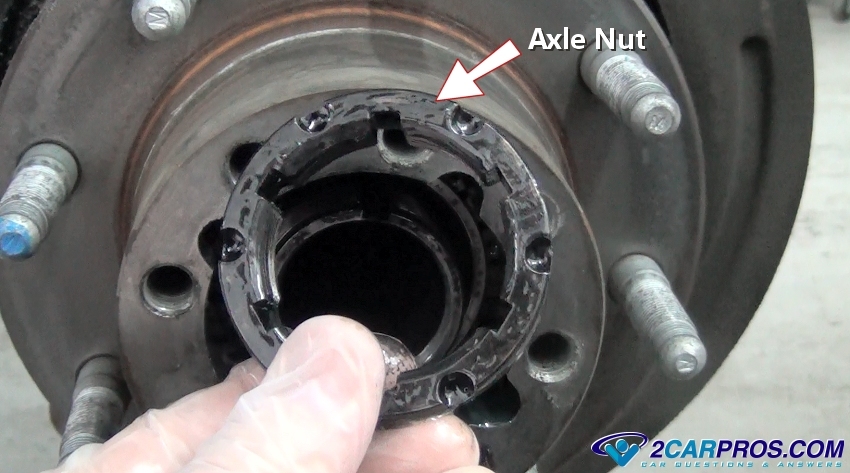
Here is what the axle nut looks like removed for the differential and bearing hub. You can see the symmetrical indentations which are used to remove the nut and the various keyway slots used for the adjustment of the bearing preload.
To remove the bearing hub use a large screwdriver or pry bar to "pop" the bearing hub loose. It can be a little stuck because of the oil seal which attached to the hub and the axle tube. Apply pressure to the hub moving it outward while turning the hub slightly.
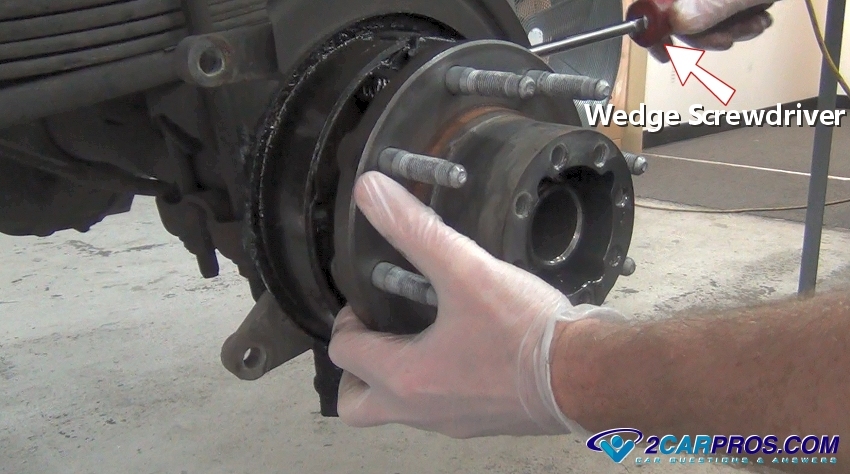
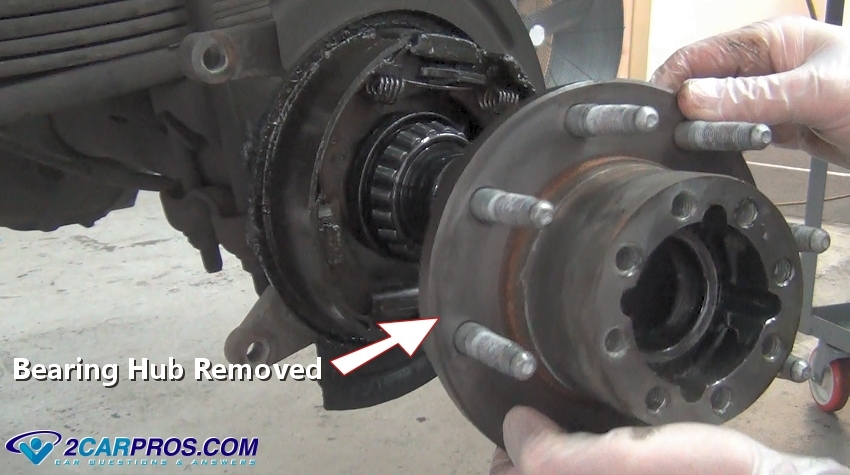
Now the bearing hub will slide off easily. It is heavy though so keep your hands on it so it doesn't fall. A slight amount of gear oil might leak out so have a shop towel ready.
SPONSORED LINKS
STEP 2
Replace the Axle Bearing and Race
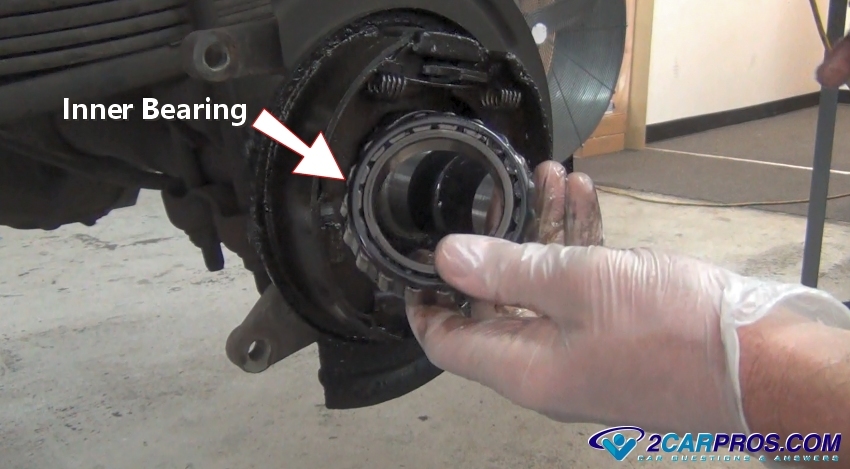
This is what the inner axle bearing looks like when it is removed from the differential housing. This bearing easily slides off of the axle tube and will have gear oil on it.
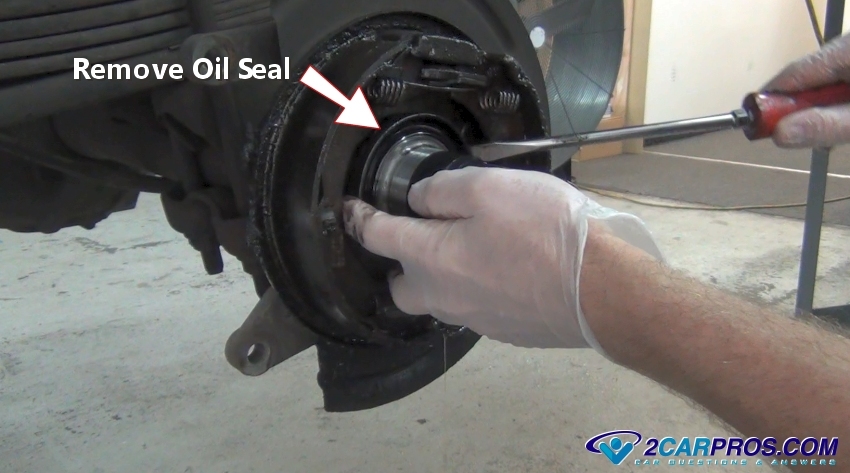
Next, use a large screwdriver or pry bar to force the oil seal from the differential. This seal is wedged between the differential housing and the bearing hub while allowing the hub to turn. This seal is a little different that traditional seals as both upper and lower parts of the seal are stationary wedged onto the bearing hub and axle tube. While the actual seal part is inside the seal assembly itself.
Use a shop towel and carburetor or brake cleaner to wipe clean the bearing hub. This is so when you reassemble the bearings you will be able to avoid getting gear oil onto the parking brake shoes or brake pads. Use care not to get cleaner on the inside of the hub.
LEAVE A REPLY
CATEGORY
LATEST POST
July 17, 2021 12.38
HOW TO FIX BLACK SMOKE FROM EXHAUST
July 16, 2021 13:37

HOW TO CHECK TIRE AIR PRESSURE
July 16, 2021 11:03

HOW TO REPLACE A REAR AXLE BEARINGS AND SEALS 3/4 AND 1 TON
July 15, 2021 21:18
HOW TO FIX POWER STEERING PROBLEMS
July 15, 2021 21:15
© Copyright 2020, All Rights Reserved by WingersWorldwide Studios LTD